
High Pressure Misting System
Discovering High Pressure Misting Systems
Summer heat can transform enjoyable outdoor gatherings into uncomfortable ordeals, especially on patios where temperatures soar. A high pressure misting system offers a game-changing solution, using advanced mist cooling technology to create evaporative outdoor cooling solutions that drop ambient temperatures by up to 30 degrees Fahrenheit.
At Cool-Off, we design high pressure misting systems that operate at 1000 PSI, producing ultra-fine mist droplets under 10 microns. These droplets evaporate rapidly in the air, absorbing heat without wetting surfaces—a marked improvement over lower pressure alternatives, which often leave everything damp and less efficient. Studies on similar applications in hot environments, like animal shelters, confirm drops of 25-30°F, making this ideal for human outdoor spaces too.
Imagine your sweltering patio turning into a cool oasis, perfect for family barbecues. Our outdoor misting systems include portable fans, mid-pressure upgrades, and professional kits tailored for seamless misting system installation. With 24/7 customer support, we guide you through every step to enhance your cooling effectively.
Preparing for Your High Pressure Misting Installation
At Cool-Off, we specialize in outdoor cooling solutions that transform patios into comfortable retreats during scorching summers. A high pressure misting system operates at around 1000 PSI, producing ultra-fine droplets that evaporate quickly for superior cooling. In contrast, low pressure systems at 50-200 PSI create coarser mist, which can leave surfaces wet and less efficient.
This difference stems from adiabatic evaporation, where water absorbs heat from the air as it turns to vapor, potentially dropping temperatures by up to 30°F. Research on misting technologies validates this, showing fine droplets enhance humidity control and evaporation rates, similar to how latent heat maintains crop temperatures in controlled environments.
The following table compares the two types for clarity:
Feature High Pressure (1000 PSI) Low Pressure (50-200 PSI)
| Droplet Size | Under 10 Microns | Large/Coarse |
| Evaporation Rate | Instant (Flash Evaporation) | Slow/Incomplete |
| Surface Wetness | Stays Dry | Becomes Damp |
High pressure options excel in efficiency, avoiding furniture damage while extending patio usability in heatwaves across the US. For instance, our pressure-optimized evaporative systems provide reliable performance with minimal maintenance. Costs for a patio misting system typically range from $500 for basic kits to $3000 for professional high pressure setups, including pumps and nozzles tailored for regions like Phoenix, Arizona.
We at Cool-Off recommend these for their edge over fans, offering better humidity management without constant airflow. Benefits include enhanced comfort, pest deterrence, and energy savings compared to traditional cooling.
When evaluating a fine-mist cooling setup, consider coverage area, nozzle quality, and pump durability to match your needs.
Assessing DIY feasibility, misting system installation suits handy users with basic plumbing skills for simpler low pressure kits. However, we advise professional help for high pressure configurations to ensure safety and optimal pressure. Versus fans, a patio misting system provides more precise evaporative cooling, especially in dry climates.
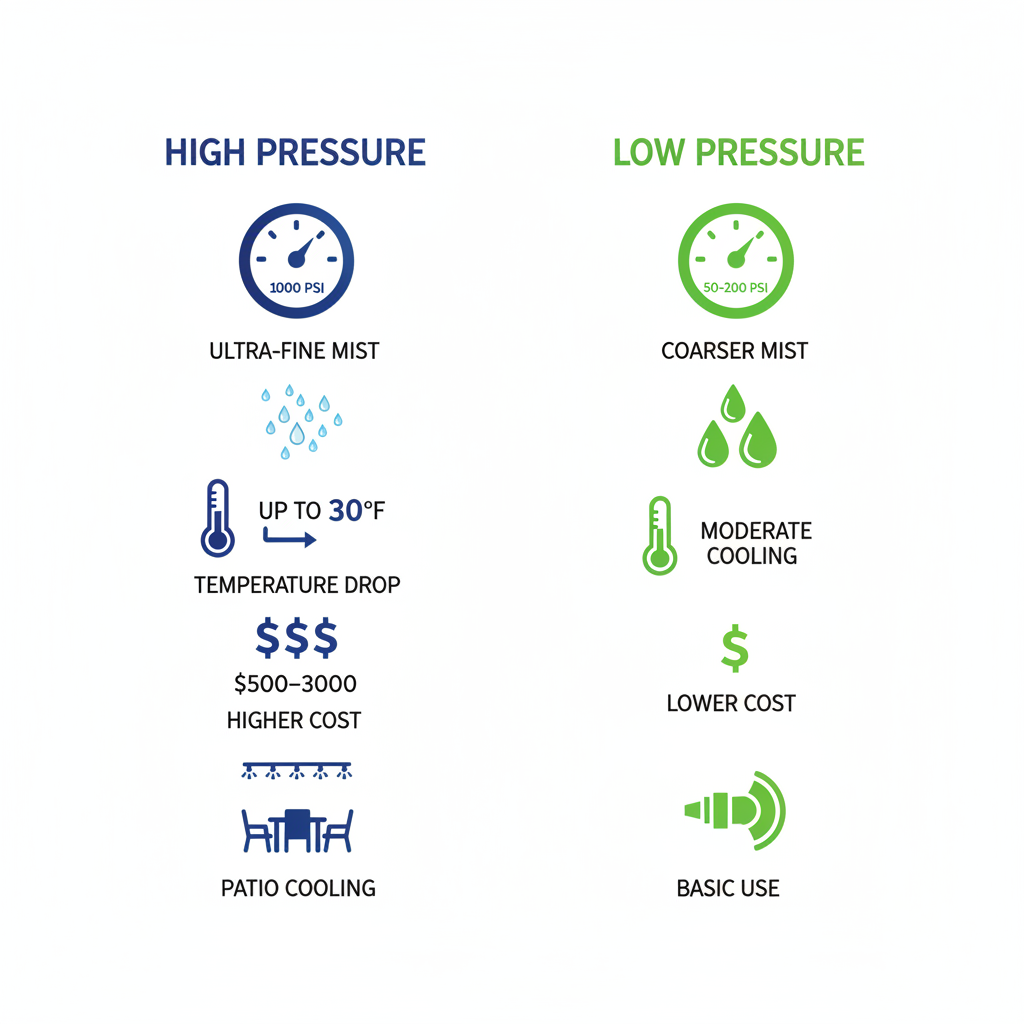
Comparison of high and low pressure misting systems key features
This visual reinforces how high pressure systems deliver finer mist for faster evaporation and drier results, ideal for seamless integration into outdoor spaces. Building on these insights, preparation ensures smooth execution.
Preparation Checklist:
- Measure patio dimensions.
- Check water source compatibility.
- Gather tools for basic plumbing.
With these steps, you're ready to proceed to installation.
Gathering Materials and Tools for Installation
Before diving into your high pressure misting system installation, we recommend gathering all essential components and tools to ensure a smooth process. Start by sourcing high-quality items from trusted providers like Cool-Off, which offers kits designed for durability in outdoor settings across major US markets, including Houston, Texas, with reliable shipping.
- Materials: Select a 1000 PSI pump for optimal pressure, high-pressure tubing that handles up to 1.5 GPM flow rates, stainless steel nozzles (pressure jet types for efficient mist distribution without dripping, as validated in mist system studies), fittings, and a water filter to prevent clogs.
- Tools: Prepare a pipe cutter, wrench set, drill, level, and Teflon tape for secure connections.
- Safety Gear: Include gloves and goggles to protect during component assembly for mist setups.
For a typical patio misting system covering 200 square feet, plan for 10-15 nozzles. This preparation prevents leaks and ensures efficient cooling performance, avoiding costly failures from cheap alternatives that compromise pressure handling.
We suggest verifying Cool-Off compatibility for seamless integration and budgeting for extras like spare filters. If exploring alternatives, review misting fans types for portable options. Always check quantities based on your space to connect effectively to layout planning next.
Planning the System Layout and Coverage
When planning a high pressure misting system for your outdoor spaces, our experience at Cool-Off shows that thoughtful layout design ensures maximum cooling efficiency. Start by measuring the patio dimensions and noting prevailing wind patterns to inform coverage mapping for cooling. Sketch tubing routes along the perimeter or overhead, positioning the pump centrally for balanced pressure distribution.
Space nozzles 3-5 feet apart to achieve optimal overlap, mounting them at 8-10 feet high for patios to avoid direct contact while accounting for obstacles like furniture. This patio misting system approach draws from shelter applications, adapting strategies for uniform mist in open areas to prevent dead zones.
Effective planning matters because uneven cooling can leave parts of your space uncomfortably warm, reducing overall comfort during hot months. By avoiding these issues, you create a refreshed environment that enhances usability.
For tips during misting system installation, use mobile apps to simulate wind effects and visualize mist flow. Our designs emphasize accessibility, making it straightforward to adjust for specific site needs.
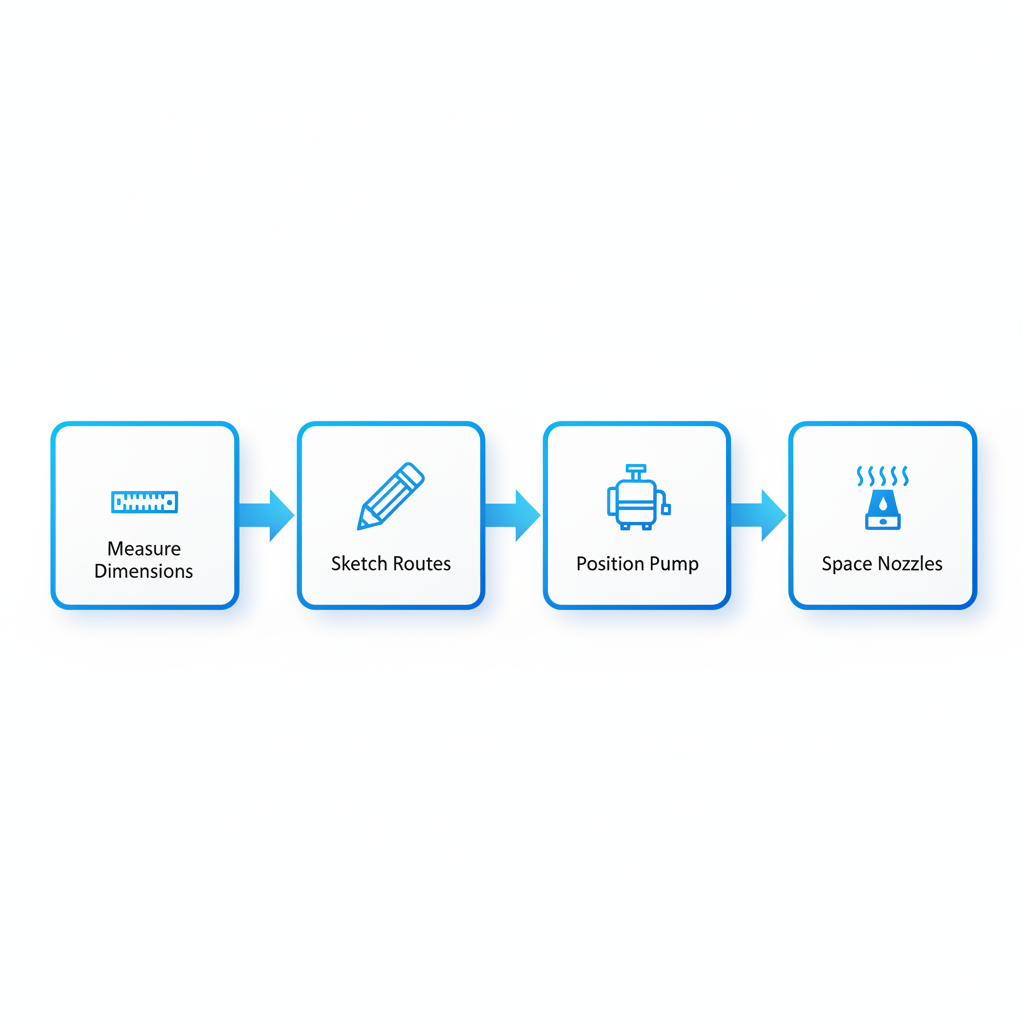
Step-by-step process for planning misting system layout and coverage
This foundational step transitions seamlessly into physical mounting, building on your gathered materials for a reliable setup.
Mounting the Pump and Connecting Power
Installing a high pressure misting system begins with properly mounting the pump, ensuring reliable operation for cooling outdoor spaces like patios. We at Cool-Off design our pumps for straightforward setup in various environments, drawing parallels from agricultural misting applications where consistent pressure maintenance protects against environmental stresses, much like in greenhouse cooling scenarios. We also offer mid pressure misting fans that complement pump setups and provide flexible options for different outdoor spaces.
Follow these numbered steps for secure mounting and power connection:
- Choose a dry, sheltered location near your water source, such as a wall in a covered patio area, to protect against weather exposure during patio misting system installations.
- Use included brackets to mount the pump at 18-24 inches above ground level for easy access and stability.
- Connect to a GFCI-protected 110V outlet, standard for US installations, sealing all connections with waterproof tape to prevent moisture ingress.
- Integrate a timer for automated cycles, enhancing efficiency in misting system installation.
This pump setup for misting prioritizes safety and longevity; improper wiring can lead to hazards or reduced performance, while stable mounting prevents vibrations that degrade components over time.
For optimal results, check voltage compatibility before powering on and consult our warranties for covered accessories. Beginners should verify local codes and consider professional assistance for power integration for systems to avoid risks.
Running and Securing the Tubing Routes
After mounting the pump, we proceed to routing the tubing for your high pressure misting system. This crucial step ensures efficient mist delivery across your patio. Begin by measuring and cutting the high pressure tubing to the required lengths using a precise cutter. For connections, opt for push-fit or crimp fittings to create leak-proof joints that withstand up to 1000 PSI.
Route the tubing along planned paths, keeping it away from sharp edges and potential kinks that could reduce pressure and impair performance. Secure the lines with mounting clips every 2-3 feet to maintain stability. Our UV-resistant tubing from Cool-Off is designed for long-term outdoor exposure, preventing degradation in harsh sun.
Proper routing matters because it guarantees uniform mist flow, avoiding pressure loss that leads to uneven cooling on patios. Secure pathways minimize leaks and extend system life, ensuring consistent comfort during hot summers.
For weatherproofing, avoid low spots where water might pool, and use insulated wraps in extreme climates. Common errors like over-tightening fittings can cause cracks, so double-check alignments. Safety checks include:
- Inspect for kinks before pressurizing.
- Test connections at full PSI.
- Ensure clips are rust-resistant.
This phase typically takes 1-2 hours, preparing your patio misting system for nozzle attachment and optimal misting system installation.
Attaching Nozzles and Fittings
In installing a high pressure misting system, the final step before connecting to the water source involves attaching nozzles and fittings to the tubing ends. We at Cool-Off design these precision-engineered components to ensure clog-resistant performance and optimal mist output, drawing from proven efficacy in reducing heat for animal shelters during summer months.
Begin the misting system installation by cleaning all filters to prevent blockages. At designated spots along the tubing, screw or clip nozzles into fittings, applying thread sealant to connections for a secure, leak-proof seal. Orient each nozzle downward at a 45-degree angle to achieve the best coverage, spacing them to allow for 100% overlap as per your layout plan. For patio misting systems, position nozzles on patios to integrate seamlessly with outdoor spaces. Avoid over-tightening to prevent damage to threads.
Proper attachment ensures uniform mist distribution, which is crucial for effective cooling across the entire area. This uniformity prevents hot spots and maximizes the system's heat reduction capabilities, as supported by applications in high-heat environments.
For adjustability, we recommend using compatible fittings that allow easy nozzle rotation post-installation. Test alignment before full activation, and consider pairing with our oscillating misting fan for enhanced airflow. Clean water is key to long-term performance, so verify connections lead smoothly into the water supply.
Connecting to Water Source and Testing
Completing the installation of your high pressure misting system involves connecting it to a reliable water source and performing thorough tests to ensure optimal performance. This final step in the misting system installation process typically adds about 30 minutes to the overall 4-6 hour DIY timeline, allowing you to enjoy immediate relief from heat in spaces like patios or outdoor areas.
Begin by attaching the inlet hose to a clean water source, such as a faucet or dedicated line, and install an inline filter to safeguard against contaminants—clean water is key for our systems. Prime the pump by running it briefly with the nozzles capped, then inspect all joints for leaks under pressure. Activate the full system for five minutes, adjusting nozzles for even mist distribution, and monitor the pressure gauge to confirm steady operation around 1000 PSI. Drawing from established testing protocols in misting applications, verify flow rates to ensure consistent output, preventing issues like nozzle clogs.
This validation process is crucial for leak prevention, which protects components from water damage and maintains efficiency in demanding environments like those in Las Vegas, Nevada. Early detection avoids costly repairs and ensures safe, reliable cooling.
For seasonal checks, we recommend inspecting connections quarterly and consulting our 24/7 support team at Cool-Off for any refinements. If adjustments are needed, refer to troubleshooting guides to fine-tune your setup.
Addressing Common Installation Challenges
Installing a high pressure misting system can transform your outdoor space, but like any project, it comes with potential hurdles. At Cool-Off, we've helped countless customers across the US navigate these during misting system installation, from residential setups to patio misting system enhancements. Common problems include leaks, clogs, and pressure inconsistencies, often stemming from water quality or improper assembly. Addressing them promptly ensures optimal performance and prevents costly downtime.
To empower you, we've outlined key challenges and solutions below in a quick-reference format. These draw from real-world applications, such as managing nozzle clogs influenced by water minerals, as seen in horticultural mist setups.
Challenge Potential Cause DIY Solution
| Leaking Joints | Loose fittings or no sealant | Tighten and apply Teflon tape |
| Clogged Nozzles | Mineral buildup/debris | Soak in vinegar or replace filter |
| Low Pressure | Pump airlock or kinked line | Prime pump and clear tubing kinks |
These DIY fixes can resolve many issues quickly, saving time and money, but poor planning often leads to overruns. For instance, uneven mist in a patio misting system might take hours to troubleshoot without experience. We recommend starting with prevention: follow our installation guides and ensure clean water sources to minimize clogs.
When challenges exceed basic troubleshooting mist setups, professional intervention is key. Expect installation fees of $200 to $500, depending on complexity, with pros handling safety risks like electrical or plumbing errors. At Cool-Off, our 24/7 support team is ready to assist—Need help? Our dedicated team are here to help. If severe issues arise shortly after purchase, review our order returns policy for options. By blending DIY efforts with expert issue resolution for pressure systems, you'll achieve a reliable, cooling oasis.
Achieving Optimal Outdoor Cooling with Misting
We've guided you through the essentials of transforming scorching outdoor spaces into inviting havens with a high pressure misting system. By harnessing the science of evaporative cooling, where fine water droplets absorb heat from the air, these systems deliver immediate relief and long-term comfort. As we've explored, proper preparation ensures successful mist deployment, from selecting durable components to integrating controls that mimic environmental needs for efficient operation.
Key takeaways include the superior benefits of a patio misting system, which lowers temperatures by up to 30 degrees while being cost-effective over time. Installation feasibility spans simple prep to troubleshooting common issues, with monthly filter checks maintaining longevity and sustained cooling efficiency, as supported by misting technologies that prevent overuse and optimize water distribution. This approach not only enhances enjoyment in areas like patios across the US but also promotes cooling system mastery without excessive energy demands.
Ready to elevate your outdoor experience? Explore Cool-Off's innovative misting systems, complete with US-wide shipping and expert guidance for seamless misting system installation. Need help? Our dedicated team is here to help at 800-504-6478 or support@cool-off.com, ensuring your path to refreshed spaces is smooth and empowering.
